其实不是特别推荐在Windows下使用kaldi,因为在egs下所有的脚本都无法运行,我也是弄了很久才在Windows下配置好kaldi,都一度差点弃坑。就连官方也说There is no commitment to support Windows. The Windows port of Kaldi is targeted at experienced developers who want to program their own apps using the kaldi libraries and are able to do the troubleshooting on their own.就让我来把坑填平那么一点点吧🧐
kaldi在Windows下的安装
工具准备
- git
- cmake
- Visual Studio 2017
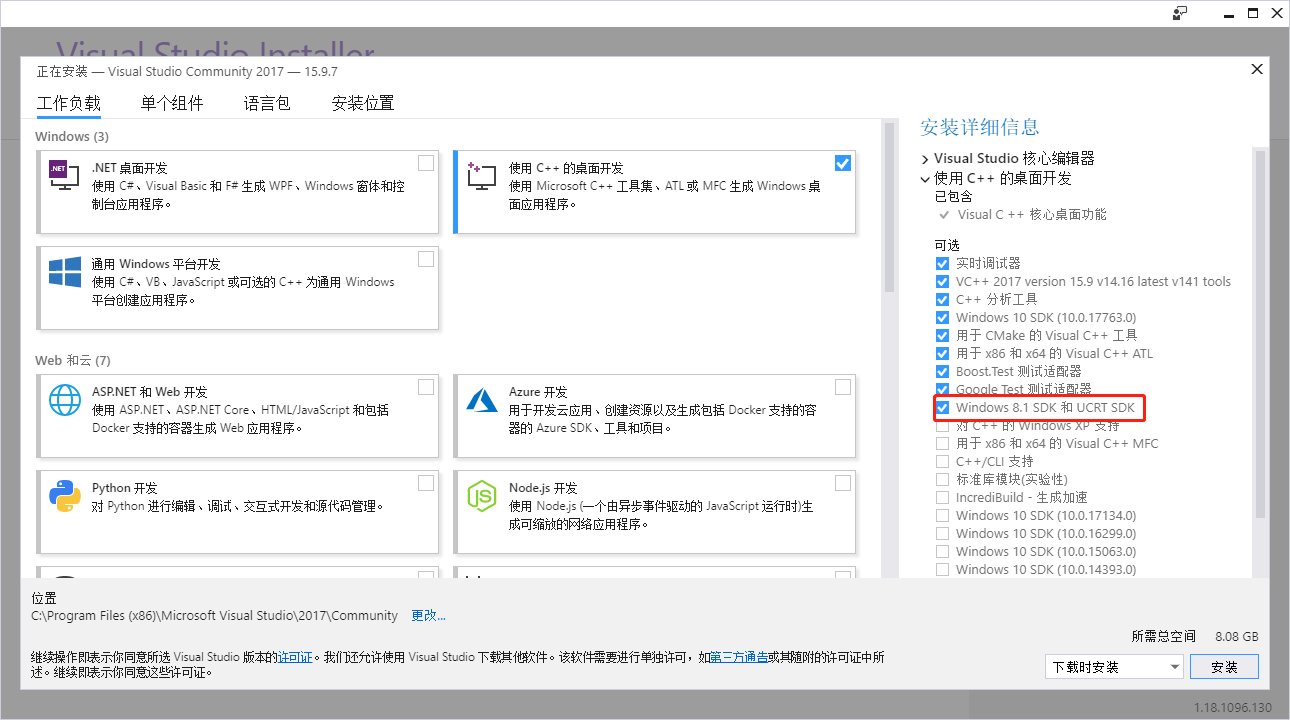
vs2017要注意安装win8.1 SDK,如果已经安装了vs2017,也可以在上方的菜单栏中的工具->获取工具和功能中来查看是否有安装。git和cmake的安装没有什么特别的,就不做介绍了。
编译Openfst
首先从github上将openfst clone下来。然后这里用cmake的方式来先编译出vs的工程文件,具体操作方法如下:
1 | git clone https://github.com/kkm000/openfst.git |
如果这一步成功会显示以下提示:
1 | -- The C compiler identification is MSVC 19.11.25547.0 |
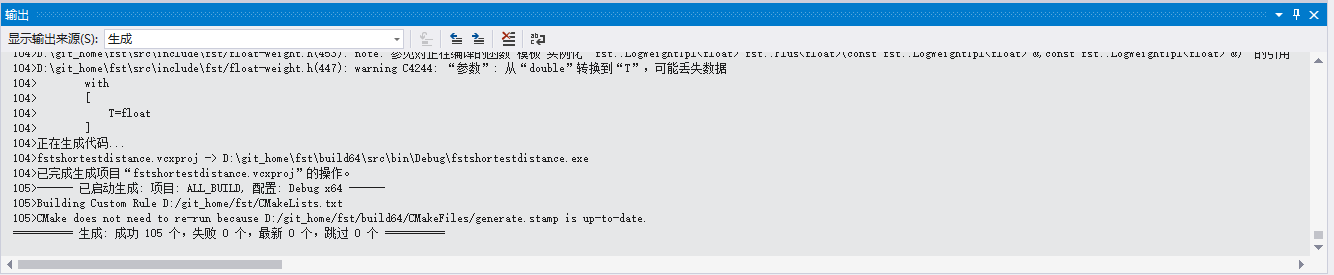
成功后会在build64目录下面生成一个openfst.sln文件,用vs2017打开这个文件,分别用Debug|x64和Release|x64来生成一遍,如下图,如果失败为0则代表编译通过。
配置OpenBLAS
首先也是从github上先将kaldi clone下来
1 | git clone https://github.com/kaldi-asr/kaldi.git kaldi |
然后我们就需要去配置线性代数库,这里有两个选择,一个是Intel MKL,一个是OpenBLAS。这里我选用OpenBLAS。用下面的命令来下载OpenBLAS的二进制包(在kaldi/tools目录下):
1 | curl -L -O http://sourceforge.net/projects/openblas/files/v0.2.14/OpenBLAS-v0.2.14-Win64-int32.zip |
注意这里要下载Win64-int32版本,而不是Win64-int64版本
修改配置文件
进入kaldi/windows路径先,将varialbe.props.dev复制一份重命名为variables.props,打开后将刚刚配置好的库修改为自己的路径:1
2
3
4
5
6
7<!-- Change the following paths so they are correct on your machine -->
<!-- Do not modify anything before this line -->
<MKLDIR>C:\Program Files\(x86)\IntelSWTools\compilers_and_libraries\windows\mkl\</MKLDIR>
<OPENBLASDIR>C:\Users\Yenda\Downloads\kaldi-svn\tools\OpenBLAS-v0.2.14-Win64-int32</OPENBLASDIR>
<OPENFST>C:\Users\jtrmal\Documents\openfst</OPENFST>
<OPENFSTLIB>C:\Users\jtrmal\Documents\openfst\build64</OPENFSTLIB>
<!-- Do not modify anything after this line -->
我们需要将OpenBLAS和Openfst修改为自己的路径,因为没有用到MKL就不用修改了。下面就是我修改后的路径:
1 | <!-- Change the following paths so they are correct on your machine --> |
产生工程文件
同样还是在kaldi/windows路径下,因为我们是使用OpenBLAS所以就把kaldiwin_openblas.props复制一份重命名为kaldiwin.prosp。然后在windows路径下用git bash运行以下命令:1
2./generate_solution.pl --vsver vs2017 --enable-openblas
./get_version.pl
kaldi编译测试
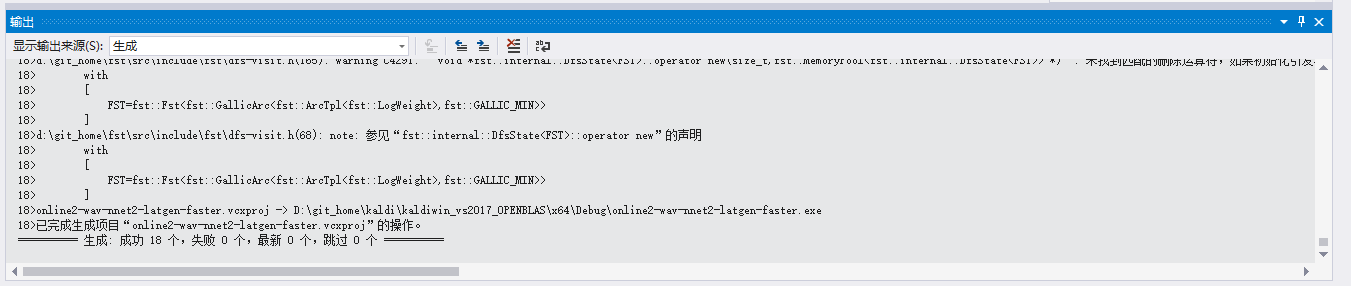
然后我们打开在kaldi/kaldiwin_vs2017_OPENBLAS这个新生成的文件夹,打卡里面的kaldiwin_vs2017.sln工程文件,这里面就包括了所有kaldi/src中*bin中的.cc文件。这时候需要来测试一下kaldi能否运行,首先要把Debug|Win32改为Debug|x64,然后右键选择online2-wav-nnet2-latgen-faster生成,如下图,如果生成成功则代表之前的工作都做对啦,kaldi已经配置好了✌️~exe文件会生成在kaldiwin_vs2017_OPENBLAS/x64/Debug中,不过当用命令行来运行刚刚生成的exe文件时,还是有可能会报错,如缺少dll等,解决方法见常见问题。
kaldi在Windows下的调试
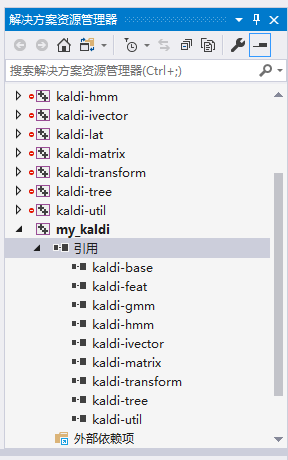
新建自己的kaldi项目
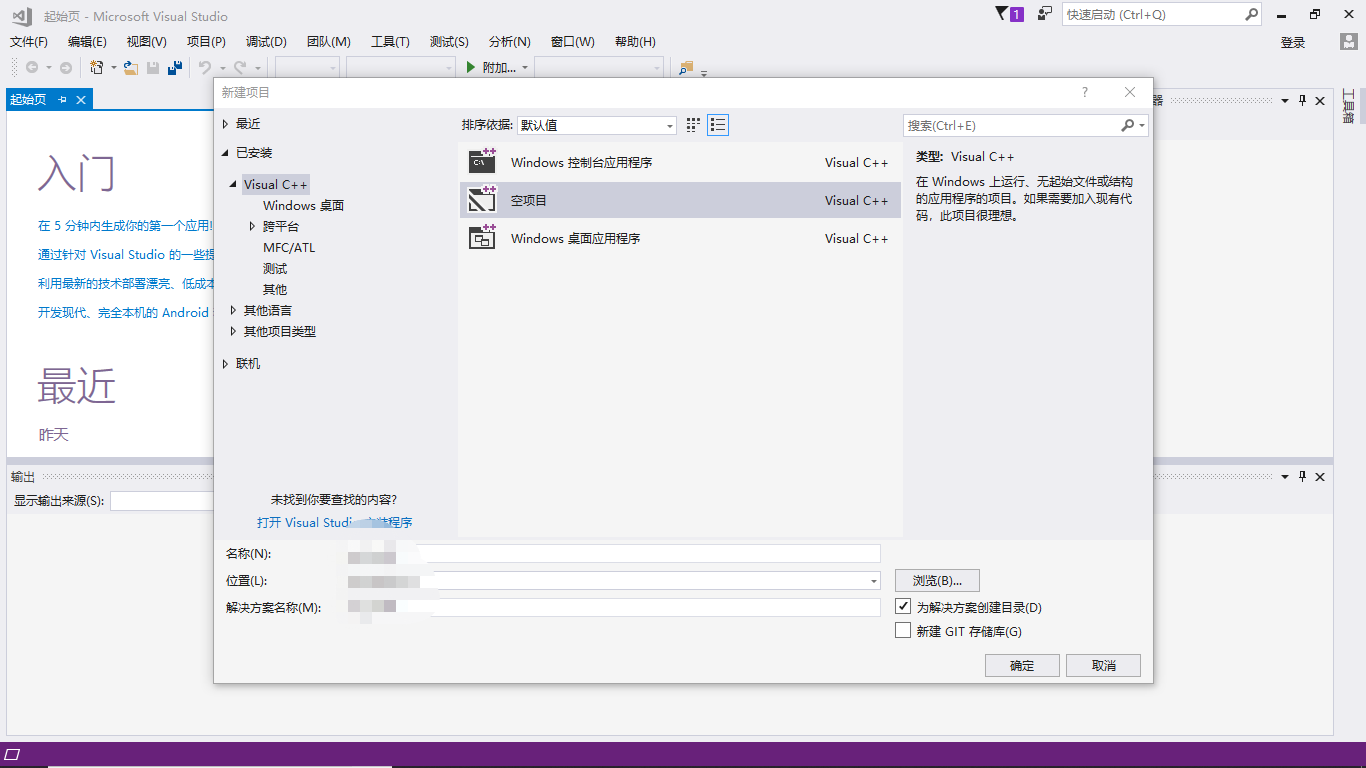
在配置好kaldi之后,就可以开始调试和编写自己的使用kaldi的程序了。不过原来的kaldi项目中有630个项目或者称为解决方案,每次打开都要加载很久。所以我们可以新建一个空项目:
添加引用
然后点击左上角文件->添加->现有项目,切换到kaldi/kaldiwin_vs2017_OPENBLAS/kaldiwin路径下。

最好把所有以kaldi开头的项目都添加进去(点进去具体的文件夹,添加.vcxproj文件),包含test的不用。不过如果你清楚你用的项目要用到哪些具体的引用,那么只添加特定的项目即可。那么要怎么看需要用到那些引用呢,这时就要回到之前那个包含630个项目的vs中去。

比如说我想要提取mfcc特征,就可以去看看compute-mfcc-feats这个项目中以用了那些项目,然后在自己的项目提取mfcc特征项目中,也要以用相同的项目,那么就把对应的项目添加到自己的项目中,如下图:
添加工程属性表
配置好引用还需要我们去添加刚才配置好的vs工程属性表,点开左上菜单栏中的视图->其他窗口->属性管理器。
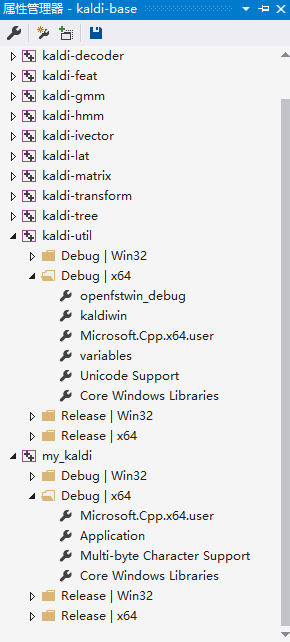
然后在自己的项目的Debug|64中添加variables.props kaldiwin.props openfst_debug.props(如果要release则添加对应的release版本)
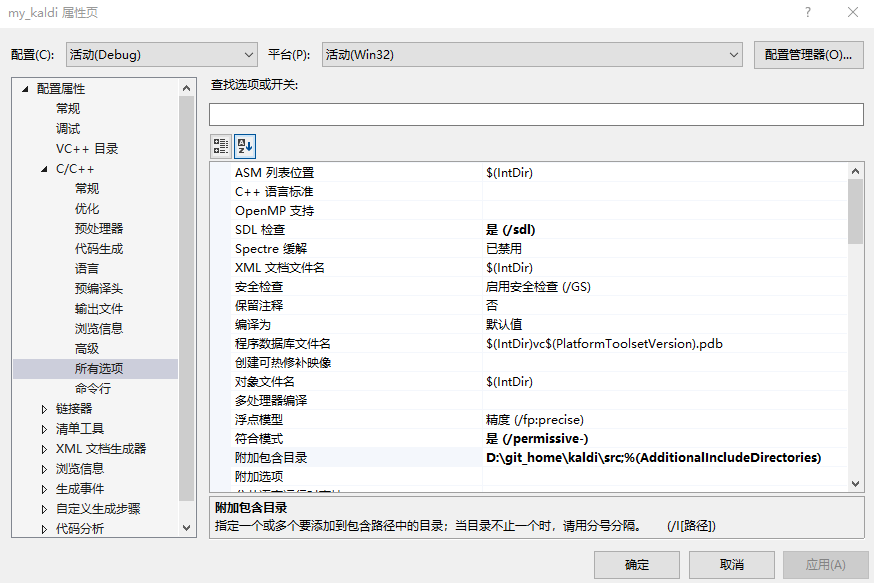
修改附加包含目录
还差一步就大功告成,首先要在自己的项目中添加一个cpp文件,然后右键属性->C/C++->所有选项->附加包含目录,需要把kaldi/src目录添加进去
配置好之后,就可以写自己的调用kaldi的程序了,之后也可以按照这样的方式来。总结一下:
- 在当前项目中文件->添加->新建项目
- 添加需要用到的引用
- 添加已经配置好的工程属性表
- 最后把kaldi/src添加到附加包含目录就可以了
- 另外要记住调试模式要切换成Debug|x64
写自己的kaldi程序
如果想写自己的调用kaldi的程序要怎么开始呢,最好的办法就是去看run.sh中用到了哪些命令,然后在看命令中C++代码是怎么做的。以提取mfcc特征为例,在声纹识别中,一般都是下面几条命令用来提取mfcc特征:
1 | run.sh |
具体的提取mfcc的特征程序就在steps/make_mfcc.sh中了
1 | make_mfcc.sh |
里面具体提取mfcc特征的命令就应该是steps/make_mfcc.sh了,看下make_mfcc.sh,在经过一系列处理后,使用compute-mfcc-feat这个命令来提取mfcc特征的。我们就可以去看在featbin下的compute-mfcc-feat.cc中是如何提取mfcc特征的,下面就贴上我的提取mfcc并写入一个txt文件的代码:
1 |
|
kaldi模型的读取
在windows上跑kaldi,不可避免地会用到kaldi中的I/O接口,比如读取在Linux下已经训练好的模型等。kaldi中的模型往往都是一个类,比如说声纹识别中用到的UBM类FullGmm,提取ivector的IvectorExtractor等等,对于这些类的提取都可以用ReadKaldiObject来完成
1 | using namespace kaldi; |
对于其他的模型,也可以通过类似的方法来读取到内存中。如果想把模型等写出来也可以通过WriteKaldiObject来完成。
kaldi在Windows下的移植
此处的移植指的是能够使kaldi在一台没有开发环境下的电脑中正常运行。刚开始要做的时候感觉可能会有各种的坑,不过实际中做要比想象中简单得多,如果上面配置基本没什么问题,移植的话也就没什么问题了。
生成exe
生成exe其实很简单,在每次Debug的时候都会自动生成一个可执行文件,不过要想在一个没有开发环境的电脑上使用,要用Release来重新生成一下。我们可以用main(int argc, char * argv[])来读取命令行的参数,然后可以用ParseOptions po(Usage);来控制输入的参数,具体参考上面提取mfcc的代码,这里就不做过多的介绍了。在移植过程中还遇到的一个问题就是缺少一些dll,主要是mingw的一些dll,解决方法见下面遇到的问题。
生成dll
如果想生成dll打包给其他程序用,就需要在头文件中想要导出的函数的前面加上declspec(dllexport),并且右键右侧的项目属性栏,把常规中的项目默认值->配置类型改为动态库(.dll)
遇到的问题记录
cmake生成Openfst工程文件失败
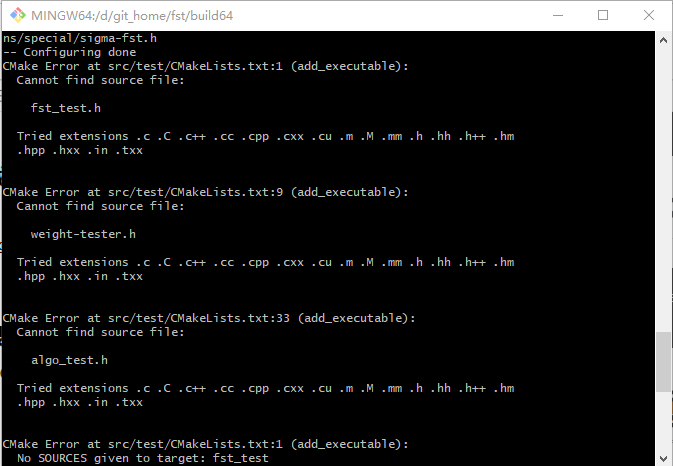
根据错误提示,应该是缺少了fst_test.h weight-tester.h algo_test.h,在openfst/src目录下搜索这几个文件,发现都在openfst\src\include\fst\test中,于是把几个文件都复制过来,然后再执行那条cmake的命令,就可以成功了~。
缺少libopenblas.dll
当在命令行或git bash中运行生成好的exe时,会报错缺少libopenblas.dll:
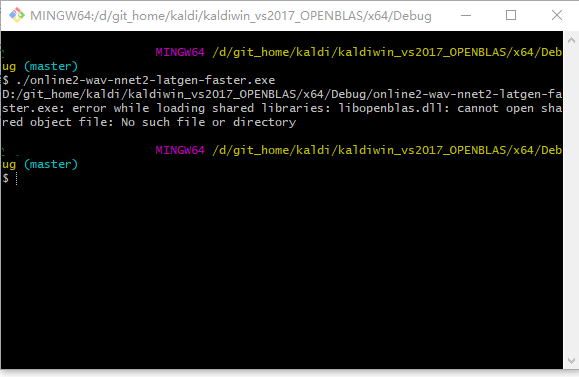
我们需要将之前下载的OpenBLAS中bin目录下的libopenblas.dll拷到和exe文件同一个文件夹中就可以执行了。
mingw dll下载
包括libgcc_s_seh-1.dll libgfortran-3.dll libquadmath-0.dll,下载后同样需要放到和exe同一目录下。1
2curl -L -O http://sourceforge.net/projects/openblas/files/v0.2.14/mingw64_dll.zip
unzip mingw64_dll.zip
参考资料
官方Windows下安装指南:
https://github.com/kaldi-asr/kaldi/blob/master/windows/INSTALL.md
一个中文的安装说明:
https://www.jianshu.com/p/5494d6607789
Windows下安装常见的问题:
https://blog.csdn.net/qq_25867649/article/details/78356474?locationNum=8&fps=1
kaldi中IO接口介绍:
http://kaldi-asr.org/doc/io.html